
Let’s learn how to host a website on your own if you are a newbie.
The first thing to consider when starting your website is to choose a web hosting provider (if you already have a web domain, if not, you can always order one alongside your hosting at InterWeb SA1).
The web hosting provider provides the web space (i.e. special computers called web servers) where your website files are stored, as well as the technologies and services needed for your website to be viewed on the Internet.
Add-on services provided by a web hosting provider typically include data backup, firewall protection, technical support, email services, domain name registration, website building tools, and applications.
If you’re just starting out, it’s a good idea to get your domain and hosting from the same company. This will ensure your domain is seamlessly and conveniently configured with your web hosting account.
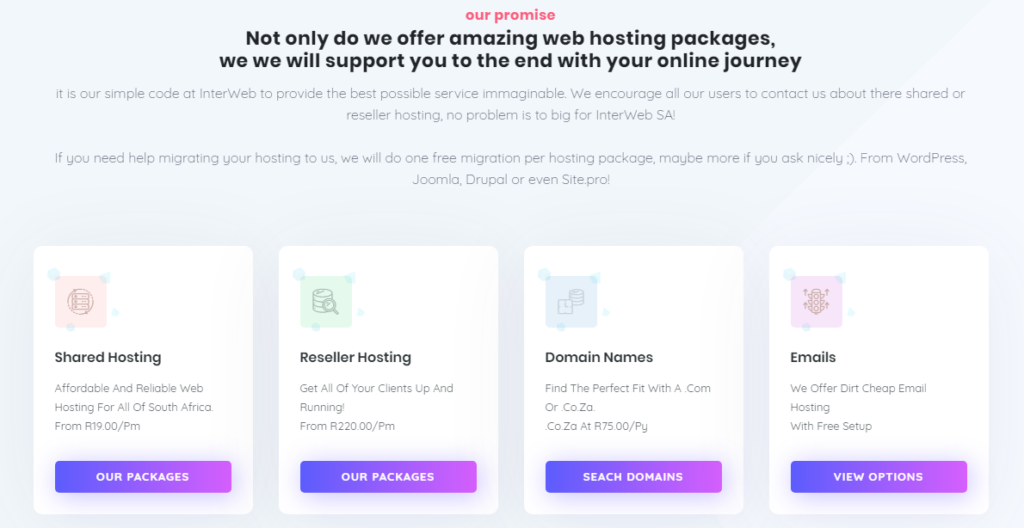
You can buy your domain and web-hosting from multiple providers, including InterWeb SA. But did you know that InterWeb SA’s support team makes hosting suprt easy and ideal for pros and beginners with little or no technical skills? We offer you a super easy way to set up (with just one click) and manage your website cost-effectively with:
- Round the clock support
- Affordable Shared and Reseller Hosting (From R19.00/pm)
- Professional Email Addresses
(with Autoresponders, Mail Forwards, Email Aliases, Mailing Lists, etc.) - 1-click installation
(WordPress, Joomla, Magento, Drupal, phpBB, Gallery and many other CMSs) - Latest cPanel
Steps to Host a Website:
Step 1: Decide What Type of Website You Want
You will typically find 2 types of websites:
- Static or Basic Websites: Static websites are simple websites with one or more web pages (called HTML pages). You can build them on your computer with software like Adobe Dreamweaver and then upload the pages to your host’s server using any FTP software (such as FileZilla) or Zip the files, upload them to your xPanel File Manager and unzip. Whenever you need to make changes to your website, you’ll have to edit the pages on your computer and upload them again. Since they cannot be modified dynamically, such websites are called static websites.Static websites are cheaper than dynamic websites (below) but come with limited functionality and no option for e-commerce or interactivity.
- Dynamic Websites: Dynamic websites contain information that changes, depending on the time of day, the viewer and other factors. They make use of both client-side and server-side scripts to create and update content. Client-side scripts, which run on a user’s computer, are mainly used for appearance and interaction purposes. Server-side scripts, which reside on a server and are extensively used by E-commerce and social networking sites, allow users to have individual accounts and provide a customized response for each user. Dynamic websites are CMS-driven, and allow you to directly add and edit content (i.e. text, design, photos, and videos), as well as let your visitors leave comments and start discussions.Dynamic websites are ideal for businesses and organizations. Examples of dynamic websites include blogs, forums, photo galleries and e-commerce sites.
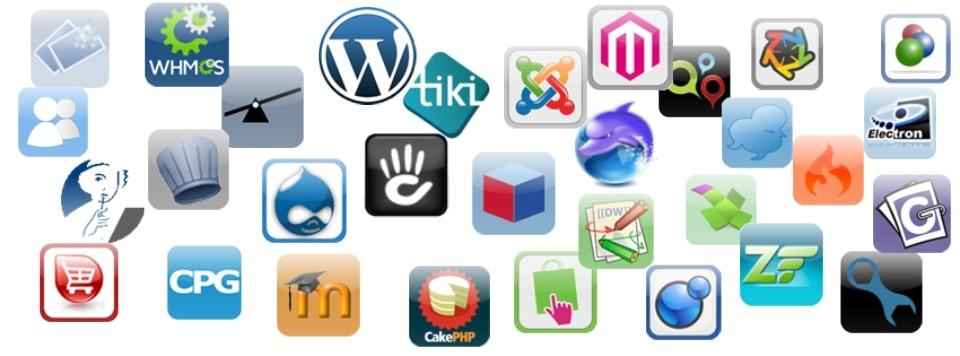
Installing a web application software like WordPress, Joomla, Magento, etc. may sound complicated but it’s not. InterWeb SA allows you one-click installation of web applications and provides friendly 24/7/365 support to make it easy.
Step 2: Choose Your Hosting Server
Unlike static HTML sites which can be hosted on most web servers, when it comes to web applications, there are basically two types of hosting platforms. Depending on your hosting needs and what you’re most comfortable with, you can choose from:
- Linux Hosting, which allows running scripts written in PHP, Perl, Python and other Unix-originated languages, and usually supports PostgreSQL and MySQL databases. This is the most commonly used system today.
- Windows Hosting, which allows running ASP scripts utilizing .NET and other Microsoft technologies, and supports Microsoft SQL Server and Access database.
You can go with either Linux hosting or Windows hosting, regardless of which operating system you use at home or at work. If your website doesn’t require any scripting support, you’ll find Linux hosting more cost-effective. But if your website needs scripting and database support, choose the platform that supports the technologies you use.
Step 3: Select Your Web Hosting Plan
You will typically find a wide range of services in web hosting, such as:
- Shared Hosting: In shared hosting, you get to share the physical server with other website owners. However, you will have your own separate account (secured with login credentials). Shared hosting is very affordable because the cost of operating the server is shared between you and the other website owners.
- VPS Hosting (Virtual Private Server Hosting): In VPS hosting, every website is stored on a very powerful server that is divided into several virtual compartments. The server software is configured separately so that each unit can function independently. It should be your preferred option if you have high-security concerns but don’t want to invest in a faster (but costlier) dedicated server.
- Dedicated Hosting: Dedicated hosting offers you an entire server for yourself, thereby making it faster, more secure…and costlier. It is the ideal solution for larger businesses and high-traffic websites because it allows for maximum customization, configuration, installation and flexibility.
- Cloud Hosting: Cloud hosting allows multiple virtual servers (clouds) to work together to host a website or a group of websites. It offers unlimited ability to handle sudden traffic spikes. A cloud-hosted website is not limited to a single server, and the resources allocated to it can shrink or expand dynamically, depending on how much traffic you get. It’s a great option for large websites, including e-commerce websites, newsletters and blogs.
Most people start with VPS (or even shared) hosting and upgrade later as their business grows. VPS hosting gives you professional web hosting capabilities at a far lower price than a dedicated server.
Step 4: Change Your DNS Address
After you have purchased your web hosting, you will get Name Servers (also known as Domain Name Servers or DNS) – which is the Internet’s equivalent of a phone book that contains IP Addresses3. To get your website up and working, you will need to change the Name Servers of your domain. It’s a simple but mandatory step for you to get started.
- Go to your Domain Control Panel via the InterWeb SA Client Area
- Enter your registered email address and password.
- Ckick on the Domains Button to see a list of all our domain names hosted at My Domains – InterWeb SA
- Click on the Domain Name for which you need to change the Name Servers.
- In the Domain Registration section, click on the Name Servers option.
- Replace the existing Name Servers with the ones provided by your current web host, and click on the Update Name Servers button.
If you have registered your domain name with a third party provider, you will need to log in to their Control Panel, update the Name Servers of the domain to those provided by InterWeb SA. However, if your domain is already using the Name Servers of the third party provider, you can add an A Record for the domain pointing to InterWeb SA’s Server IP in the third Party DNS Zone. After you have changed your DNS, it will take about 24-48 hours for your website to start resolving to InterWeb SA’s servers.
Step 5: Upload Your Website
You can now upload your website to your account by connecting to the server using either cPanel’s File Manager or an FTP Client (such as FileZilla) – after which your website will go live.
- How to Upload Your Website Using cPanel File Manager
- Log in to your cPanel.
- Click on the icon titled File Manager.
- Select Web Root and click on Go.
- Add all the files and folders under public_html and their respective domain folder.
- How to Upload Your Website Using FTP Client
- How to Upload Your Website Using cPanel File Manager
You can connect to FTP via an FTP program such as FileZilla Client. It allows you to see the files and folders on our server like you’d see them on your computer. You can use it to drag and drop your website’s files into the /public_html/ folder. To connect to your web server via FileZilla, follow these steps:
- Install FileZilla and open it
- From the File menu, select Site Manager
- Click on New Site
- Name the New Site – such as with your real domain name
- Enter your website’s IP address in the field marked FTP Address
- Enter the username and password you received in your welcome mail
- Set the Port to 21 (FTP always runs on Port 21)
- Click Connect
Once your FTP is connected, you will see the files and folders of your:
- Local computer on the left
- Web hosting service on the right
To upload files to your hosting service provider via FileZilla, follow these steps:
- From the left-hand side of FileZilla, select the file(s) and folder(s) you want to upload.
- Drag and drop the file(s) and folder(s) to the directory location on the right side of your web hosting service. FileZilla will now start uploading.
- After the uploading is finished, FileZilla log will confirm success and your uploads will be visible on the right-hand side.
Viola! Your website is now live.
Article by HostGator India