
If you are considering using Joomla to create your own web presence, you have come to the right place. In the following, you will learn all you need to know to get started.
This step-by-step tutorial will show you how to install the software on your server and give you an overview of the basic functionality. In the end, we want you to feel able to start exploring by yourself and build the Joomla website of your dreams.
While Joomla being more complex than WordPress, it is far more beginner-friendly than Drupal.
• Read our comparison article – Joomla vs Drupal vs WordPress
So you if you follow the tutorial, you should get your website up and running within 3 hours or less.
How to build a Joomla website (table of contents):
- Register a domain name and find web hosting service
- Install and set up Joomla
- Get familiar with Joomla basics
- Select a template for your site
- Install your Joomla template
- Customize the design
- Use Joomla modules
- Assign modules to positions
- Create new pages
- Assign pages to the Joomla navigation menu
- Add a blog section
- Install extensions
Total time to create a website using Drupal: ~2-3 hours
Skill level: Beginner/Intermediate
1. Register a domain name and find web hosting service
If you already have a domain name and web hosting, skip to step 2.
Before you can start building your Joomla site, you’ll need a domain name and web hosting.
If you don’t even know where to start on this topic, read our post on how to register a domain name. In case you just need a refresher, choose a website domain that is simple, so it’s easy to remember.
Aside from a domain name, you’ll also need a web hosting service.
You can get both domain name and web hosting from InterWeb SA (we offer a free domain if paying annually).

They have a quick install for Joomla so you don’t need to spend your time downloading, uploading and installing it manually via FTP.
If you decide to use another web host, make sure it meets Joomla system requirements, which you can find here.
2. Install and set up Joomla
There are two ways to install and set up Joomla.
3. Get familiar with Joomla basics
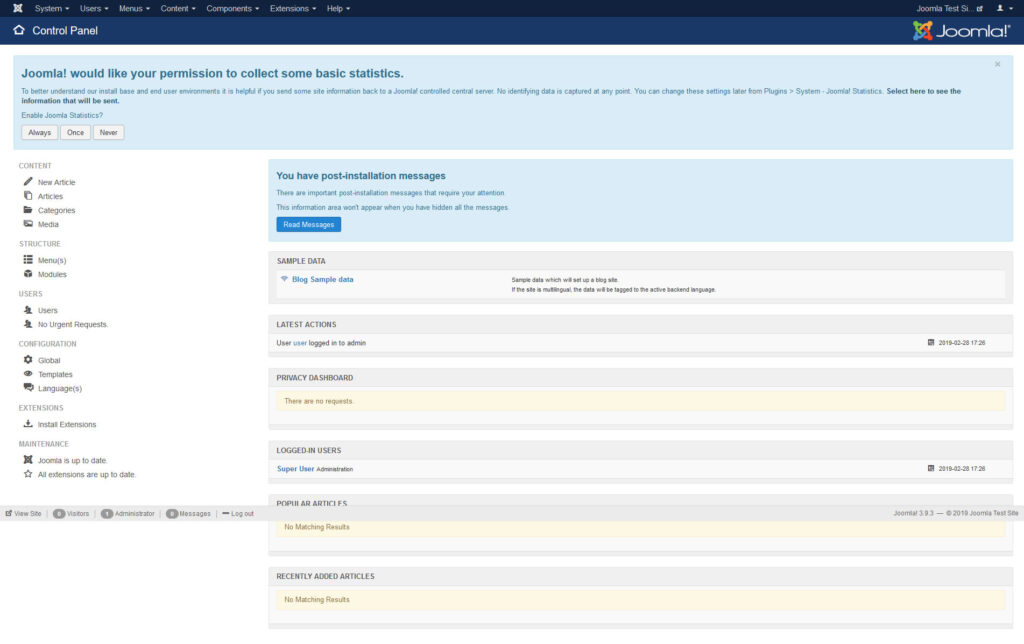
The next step in learning how to build a website with Joomla is getting your bearings. We will use many of the menus you can see in the control panel further below, however, it helps to have a bird’s eye view to get started.
Obviously, you can get rid of the two blue boxes by opting in or out of Joomla collecting statistical data and then reading (and hiding) your post-installation messages.
On the left, you find shortcuts to frequently used parts of the admin area, such as creating new articles, changing the menu structure or installing extensions. On the right, is important information about the state of your site.
However, the most important part is the taskbar at the top. Here, you find the same options as in the control panel and then some. This is what the different menus contain:
- System – Access to the control panel, site settings, pending or locked content items, the option to clear cache and view system information (site, server, and environment).
- Users – Manage users, user groups and access levels, add notes about users, deal with privacy related requests, view user logs and mass email everyone on your site.
- Menus – As the name suggests, this contains all options about the creation and management of menus.
- Content – Add articles and taxonomies, assign featured content and manage your site’s media files.
- Components – Create and manage site banners, contacts, site updates, private messages, multilingual associations, and news feeds. It also provides access to post-installation messages (we already covered those), lets you set up redirects (though you need a plugin for that), view site search terms, use the smart search (again, this needs a plugin) and manage tags.
- Extensions – Allows you to install, update, manage, configure, find and troubleshoot extensions. In this menu, you can also see the state of your database and update your site.
- Help – Direct access to important help topics in the official documentation.
All clear so far? Then let’s move on.
4. Select a template for your site
Like other content management systems featured on this site, Joomla offers a way to change your site design without coding. Here, the tools to do so are called Templates. Your entire website’s look, function, and feel are entirely dependent on them. So, don’t underestimate the decision when choosing one!
There are free and premium (paid) Joomla templates available. However, finding one can be tricky. Unfortunately, the CMS does not have a central directory for this. Therefore, you need to look around shops to find them. Many of those who sell premium themes also offer free versions you can test drive. Here are a few places to get started:
Of course, there are a few basic characteristics you should pay attention to while selecting a theme. First is obviously your own taste. However, you should also consider the following:
- Support – It’s great to have technical support included, as these people can fix any issue for you.
- Updates – Joomla constantly updates their system. Make sure your template provider also updates their templates frequently to make sure it will work with the latest releases.
- Documentation – From time to time, you’ll need to check some features to learn how they work. Be sure there is a place where you can do so.
- Responsiveness and cross-browser compatibility – This means your template should look great in every browser as well as on any mobile device.
- Customizability – Check out which template features can be customized by yourself. For example, look for templates that have many module positions (more on that soon).
5. Install your Joomla template
Installing a template in Joomla is quite easy in principle. Once you have made a choice, you usually get it in the form of a zip file. This you can simply upload under Extensions > Install.
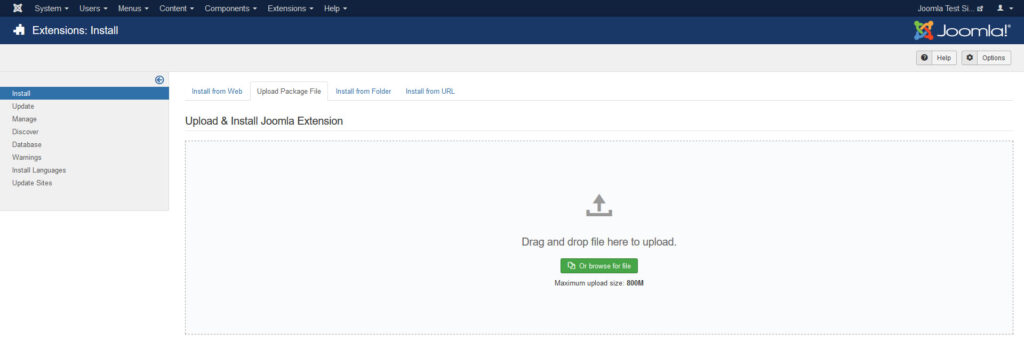
Either drag and drop it into the field or click the Or browse for file button to find it on your hard drive. Select it and Joomla should do the rest by itself. Alternatively, you can also install the template via its URL if you know where the package resides.
After that, you still need to activate the template and you do that under Extensions > Template > Styles. Here, click the star icon to the right of the template name to make it the default for the entire site.

Note that, when downloading your template, you might get additional files such as quickstart, settings, and extension. The first is a complete version of Joomla including the template. That way, your new design is already ready to go when your site is set up, often including demo content. The latter can make sense to include so everything is set up as in the demo and all you need to do is exchange the content. The other two files to refer to stuff that you might have seen in the template demo site, such as sliders, etc.
6. Customize the design
When you build a website with Joomla, one of the main goals is to create the design you want. In order to do so, most templates come with at least some customization options and you can access them by clicking on the template name in the list.
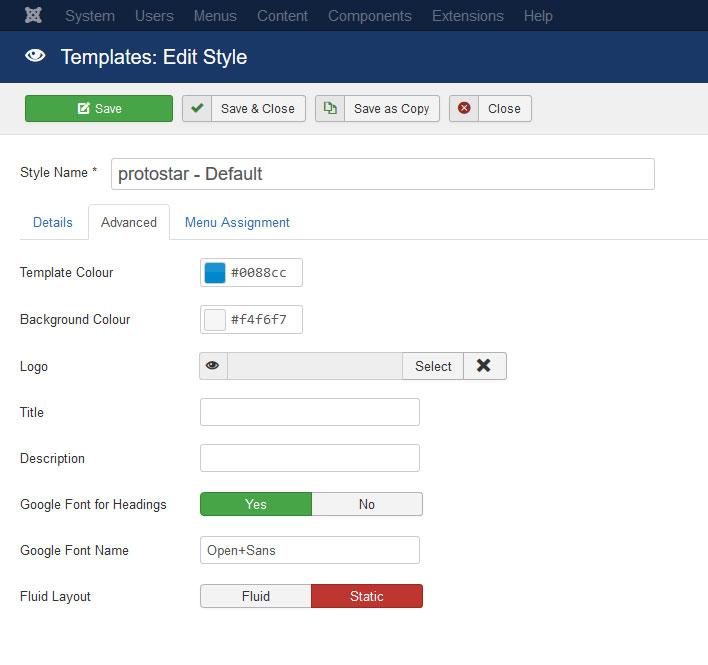
Here, you can make adjustments to things like colors, fonts, logos, sizes, and much more. Some templates also come with their own settings page where they let you control a lot more and preview the changes in real-time. In either case, don’t forget to check out what your template has to offer and to save any changes you have made!
7. Use Joomla modules
Right now, even if it looks better, your site is still pretty empty. Time to change that. From here, we will go over how to create content in Joomla.
Unfortunately, we have to start with one of the more complicated topics, which is modules. These are little units of content that can appear in many places of a page. They work like building blocks that you can create different designs from. However, using them takes some getting used to. Let’s try it out on the homepage.
To build a page from scratch, it’s best to start by enabling the preview mode for module positions. This way, you can see on where exactly on your page you can add modules and the names of the positions.
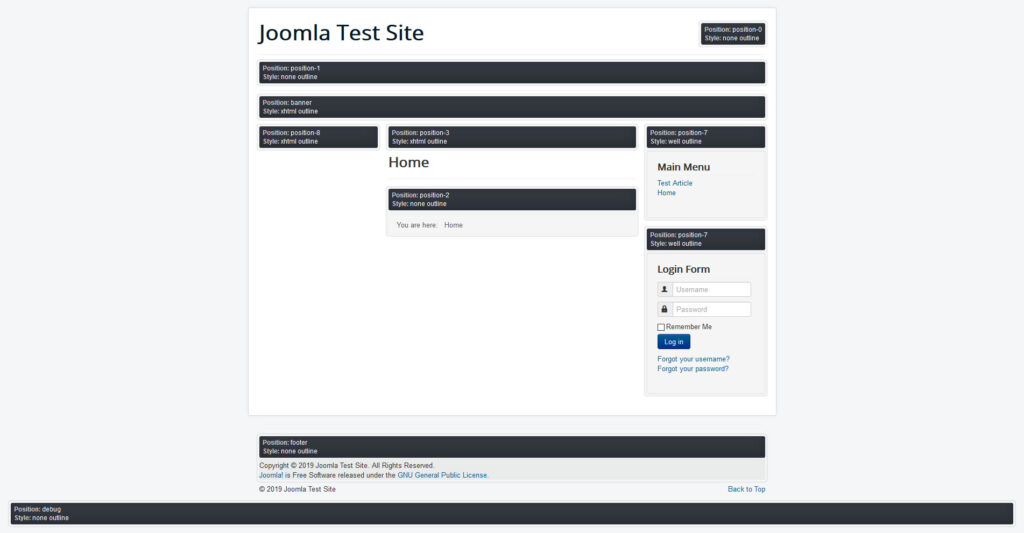
To see something like the above, go to System > Global Configuration > Templates.
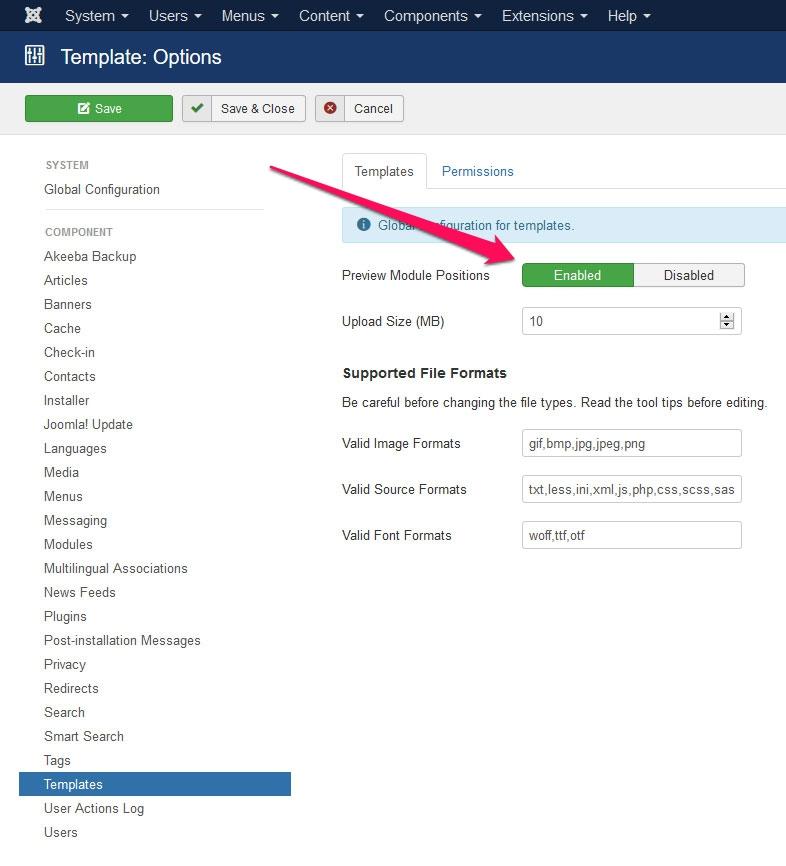
Here, set Preview Module Positions to Enabled, save, and close. Then, go back to your list of templates and click the Preview button (the eye icon). This will then display all available module positions as shown above.
Quick note: Don’t forget to switch the preview off when you are done assigning modules.
8. Assign modules to positions
Alright, now that you know where your modules can go, how do you assign them to those positions? All of that happens under Extensions > Modules.

Here, you can see all which are currently active on your site plus the positions, pages, users, and languages they are assigned to. However, don’t worry, these aren’t the only options available to you. Under New in the upper left corner, you find a whole lot of other blocks you can use on your site.
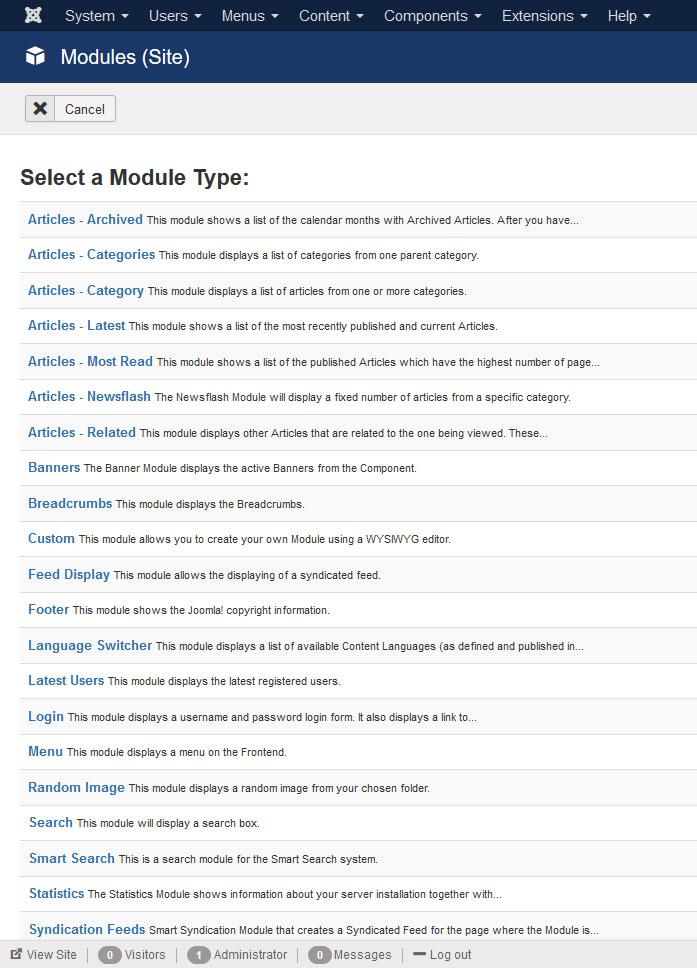
Let’s say you wanted to include some text about you and your site on the homepage. The first thing you would do is check where on the page it would go. In this case, this is position-2. Then, you would go to the modules menu, create a new one and choose Custom as the type. This allows you to create your own content block using a WYSIWYG (what you see is what you get) editor.

This is simply an editor for creating and formatting content that lets you view what you are doing. Unfortunately, it would take too long to go over all of the options in this screen. However, if have ever used a word processor, everything should look very familiar. In addition, you can hover over any of the icons to get a description of what it does. This way, you should be able to quickly figure out how to write and format text, insert headings, images and other media and anything else it has to offer.
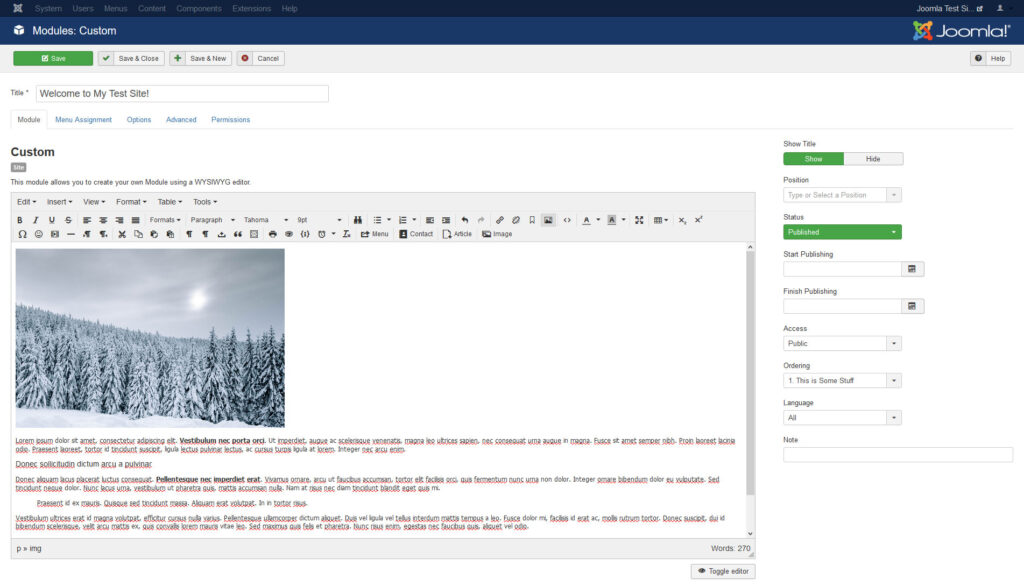
When you are done, make sure that when you save, Status on the right is set to Published and that you pick the correct template location under Position (pay attention that you select your active theme!). Then, go to Menu Assignment (the tab below the title) and use the drop-down menu to choose the pages you want to show this module on. In this case, it’s Only on the pages selected and then Home.
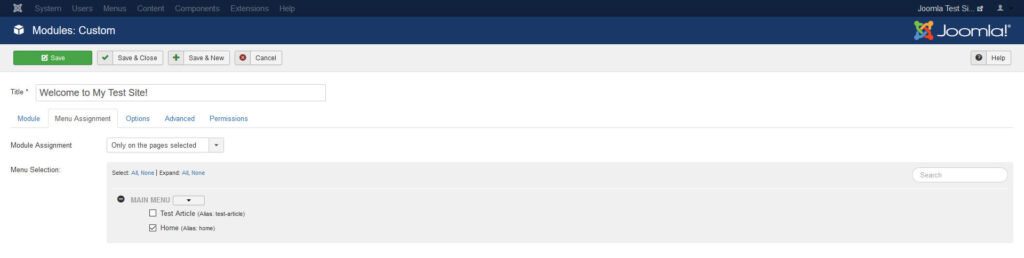
Save and you should see it on your homepage (and only there).

You can use this same method to insert other things into pages like blog posts (more on that below), banners, menus, images, and iframes. In addition, you can also add new modules via extensions (more on that below as well).
9. Create new pages
Now for something easier: pages. When you build a site with Joomla, you will likely create several of them. However, once you have mastered the above, this part should be much easier.
The first thing to learn about pages in Joomla is that you create them in one place and make them appear in another. This is a general thing to keep in mind that anything you create in Joomla won’t automatically show up on your site.
In Joomla, pages are simply called articles. This can be a little confusing at first when coming from a blogging background but don’t let that hold you up. You can create articles via Content > Articles > Add New Article. Alternatively, use the shortcut on the control panel. Both will get you to a very similar editing screen that you used before.
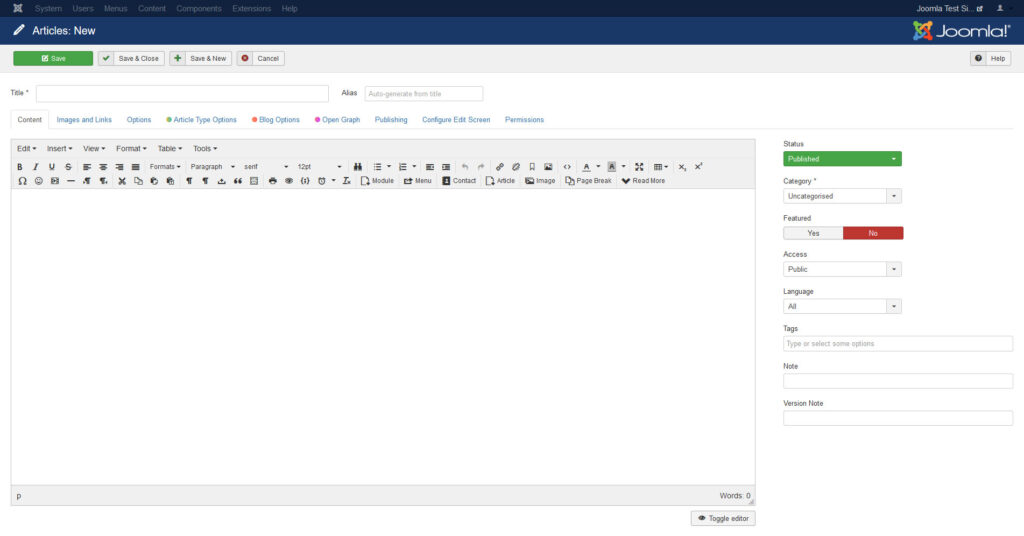
Create and format content the same way as earlier. When you are done, under Alias you are able to determine a permalink (meaning page URL). It often makes sense to put a keyword here instead of using the same title as the article. Under Status make sure that it is set to Publish before saving.
10. Assign pages to the Joomla navigation menu
To allow visitors to access your new page, it’s time to assign it to a menu. You can do so the following way: Under Menus, find the one with the house icon assigned to it. That is your currently active one.
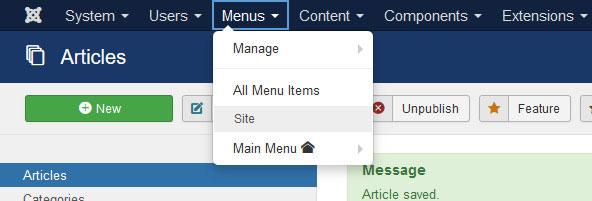
To assign a new link to it, hover over it and pick Add New Menu Item. Doing so will take you to the screen below.
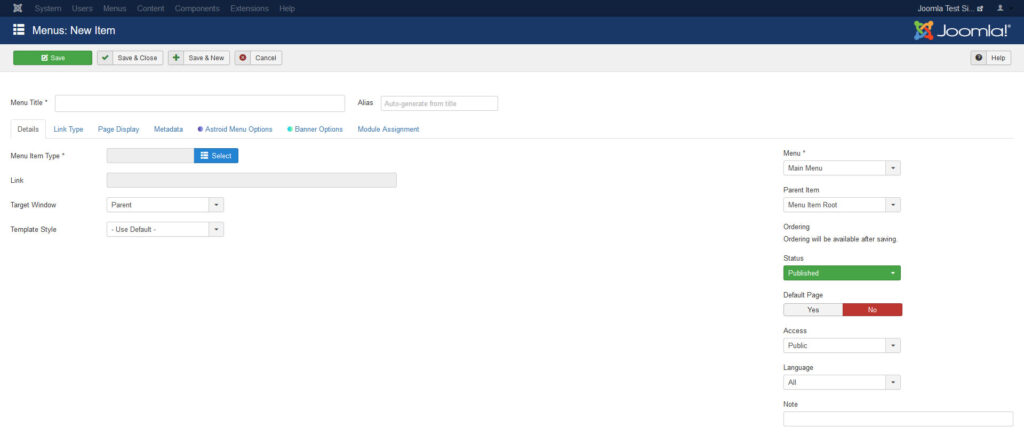
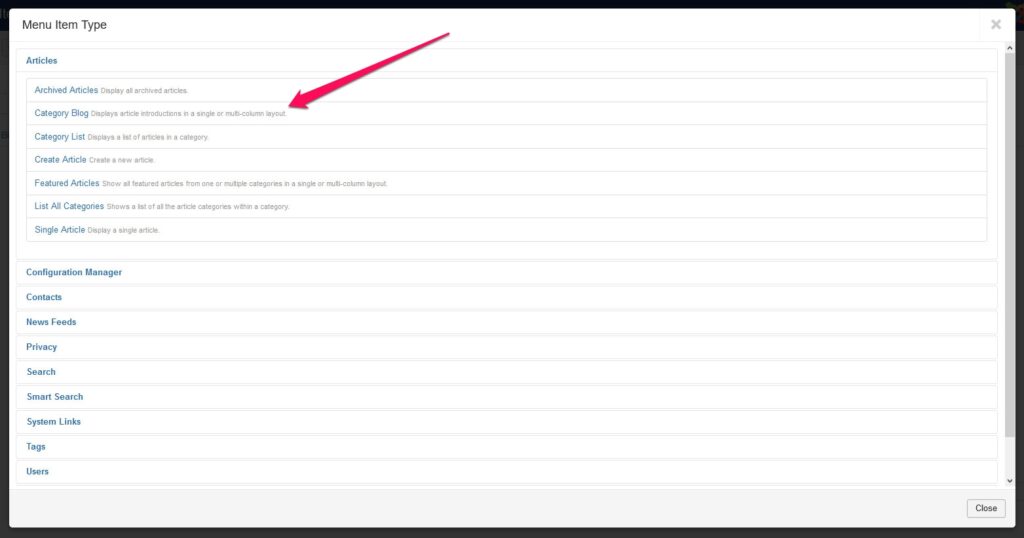
Under Menu Item Type, select Article > Single Article. Then, under Select Article, you can choose existing content on your site via Select and then clicking on the title of the one you want to assign.
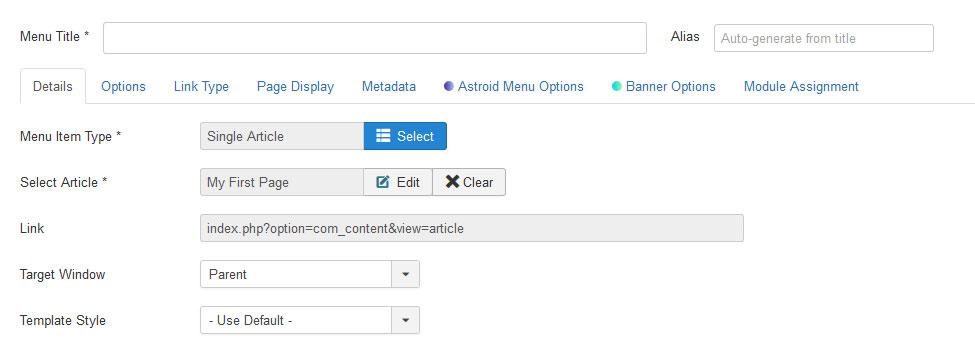
Now you only need to input a Menu Title at the top (which is the text that will appear in the menu) and make sure the menu to assign it to is selected on right. When you now save and close, you can use the icon on the left to drag menu items around and change their order.
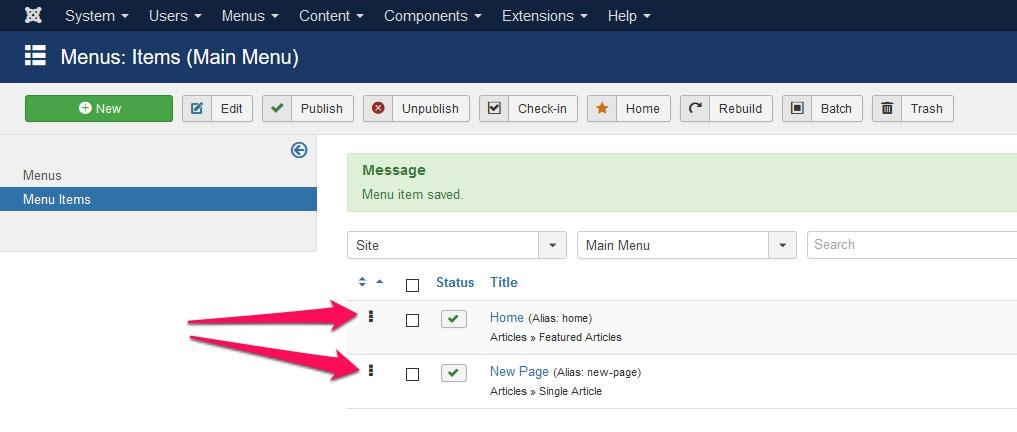
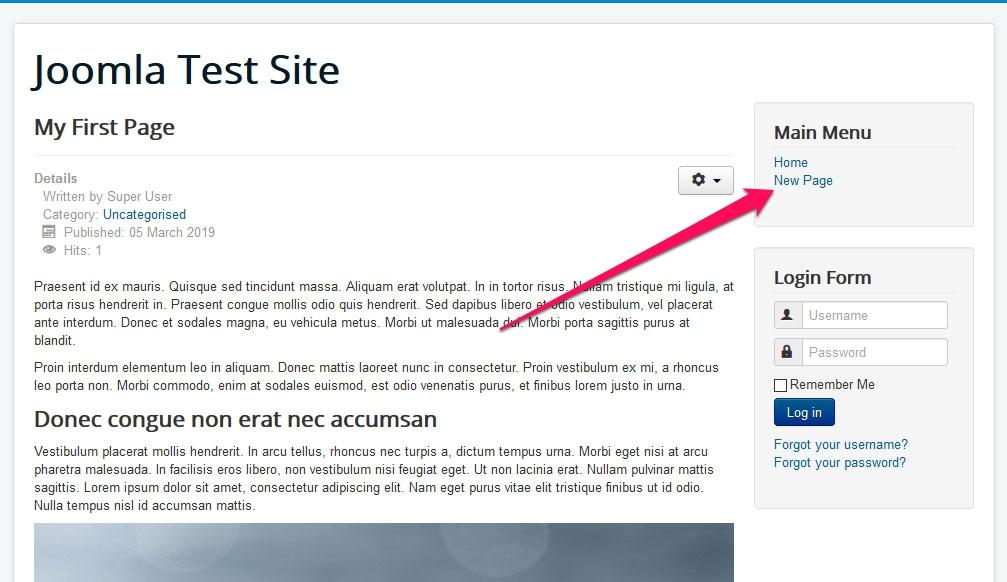
When you are satisfied and go back to your site, the new item should now appear.
11. Add a blog section
However, you can not only create pages, it is also possible to publish blog posts in Joomla. It basically works the same way only that you will assign your blog posts to a category. To do so, you have to create it first.
You can do this under Content > Categories > Add New Category. It takes you to the same editor as before. In this case, you only have to input a name at the top (e.g. Blog) then save and close.
After that, you can assign the category to your menu the same way you did with the page before. Only this time, under Menu Item Type, choose Articles > Category Blog.
After you have done so, make sure to select your Blog category under Choose a Category. Then, be sure to check that it’s assigned to the right menu and give it a menu title that makes sense. Save and close to get it on your site. From now on, any article that you assign to your Blog category will show up in the form of a blog post under that menu item.
12. Install extensions
The final thing we want to talk about are extensions. With their help, you can bring new features and functionality to your site. You find them in the official Joomla extension directory.

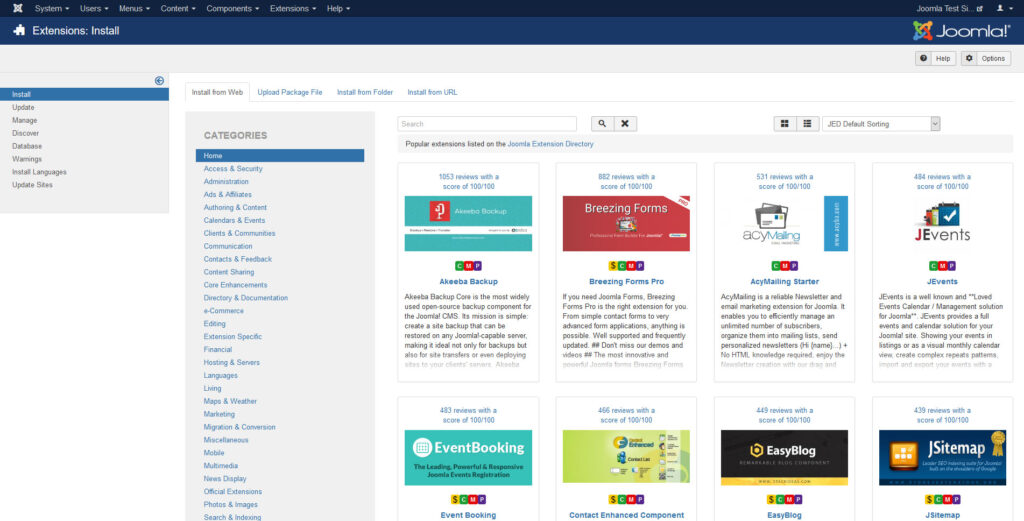
Just input a search term, use the categories below or the advanced search to find what you are looking for. However, with almost 8,000 available extensions, it can be difficult to make a choice.
Once you know what to install on your site, you have several ways of doing so. You find them all under Extensions > Install. When you are there for the first time, at the top you find the option to set up the install from web option. When you do, it gives you access to everything in the Joomla extension directory right from your back end.
Click on any extension and then hit the Install button (twice) to automatically load it onto your site. Should this not work for you for some reason, you can simply download the extension or copy the URL where it is located. After that, you are able to use the Upload Package File and Install from URL tabs to get it on your site.
Note, that you might still have to activate parts of the extension under Extensions > Manage.
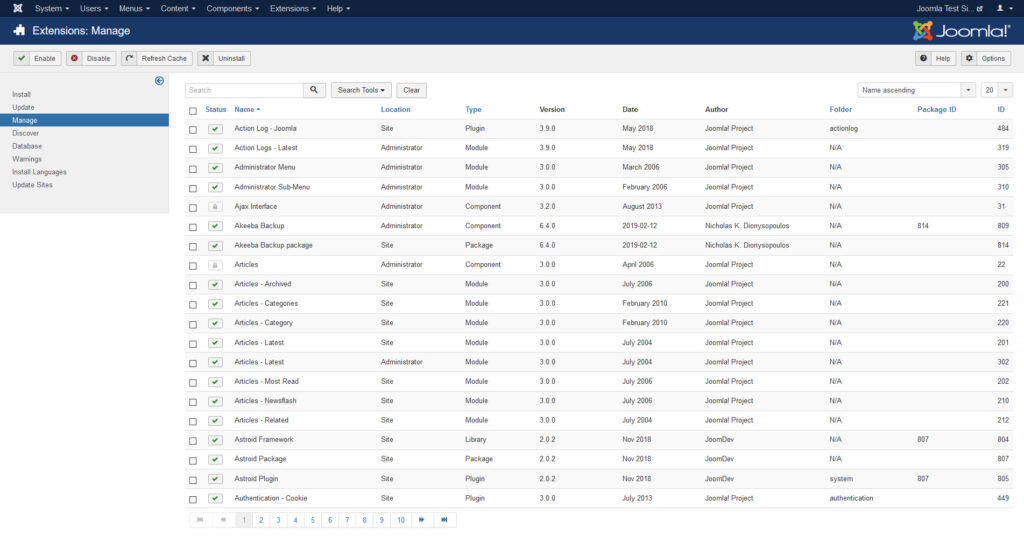
From here, you are also able to deactivate and uninstall extension you no longer need. Unfortunately, it’s a bit confusing and crowded, so you might have to search for your extension by name.